Introduction
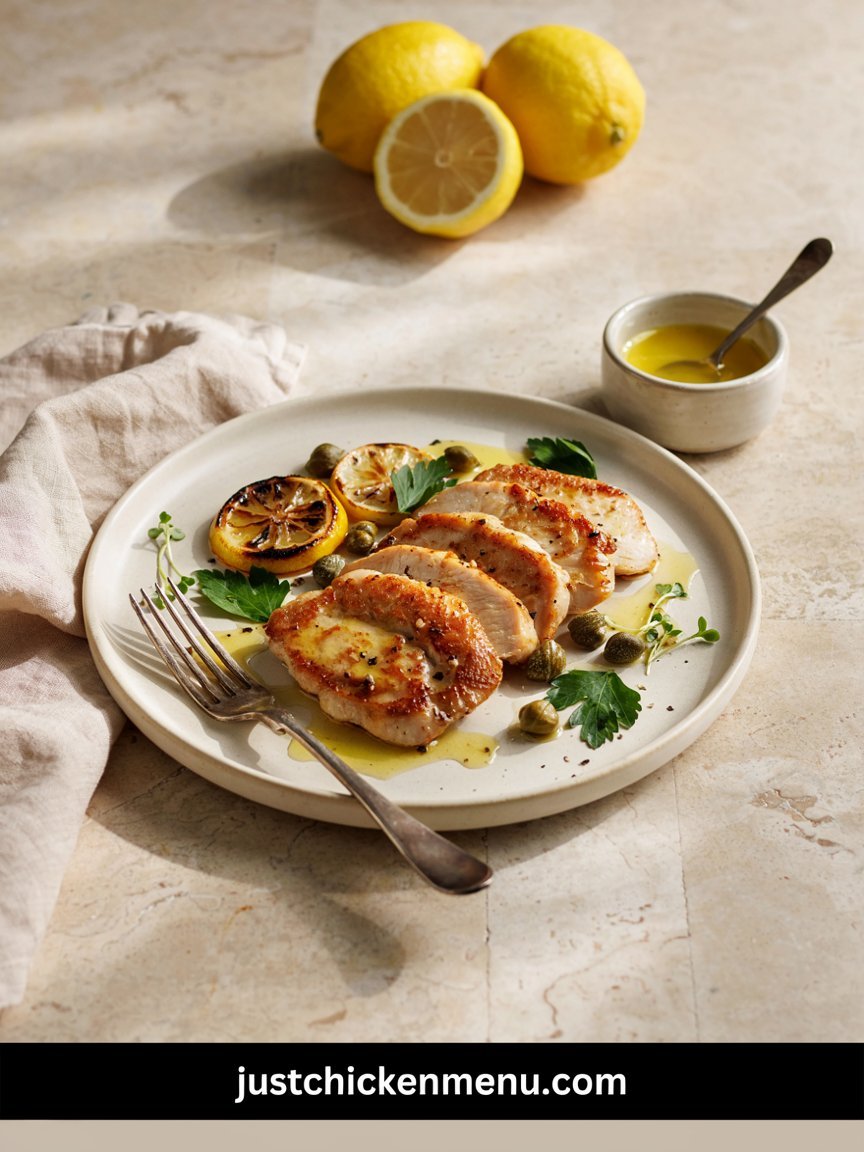
There’s something wonderfully theatrical about a plate of chicken scallopini — thin, golden cutlets bathed in a glossy, lemony butter sauce that pools around them just waiting to be soaked up with a hunk of crusty bread. It’s the kind of dish that looks like it took hours of restaurant-level effort, yet it comes together in well under 30 minutes using a handful of pantry staples. That contrast between “wow, this is fancy” and “wait, that was easy?” is exactly why this recipe has earned a permanent spot in my weeknight rotation.
What makes this version special is the balance struck in the sauce. It’s bright with fresh lemon juice, deepened with a splash of dry white wine, and finished with cold butter swirled in off the heat so it turns silky rather than greasy. The chicken itself gets a light dredge in seasoned flour, which does double duty: it helps the cutlets develop a delicate golden crust, and it naturally thickens the pan sauce as it simmers. The result is tender, juicy chicken with a sauce that clings to every bite instead of running off the plate.
This is the kind of meal that works just as well on a rushed Tuesday night as it does for a small dinner party. Serve it over a bed of buttery pasta, alongside creamy mashed potatoes, or with a simple green salad, and you’ve got a dish that feels a little bit special without demanding a special-occasion amount of effort.
Why You’ll Love This Recipe
- Ready in about 30 minutes, making it perfect for busy weeknights
- Uses one skillet for both the chicken and the sauce, which means less cleanup
- The lemon-butter-wine sauce is bright, rich, and endlessly versatile
- Thin cutlets cook quickly and stay tender instead of drying out
- Looks and tastes like a restaurant dish but costs a fraction of the price
- Easily doubled to feed a crowd or halved for a quiet dinner for two
- Naturally gluten-free with a simple flour swap
- Leftovers reheat beautifully, so it’s great for meal prep too
Ingredients
Chicken
- 4 boneless, skinless chicken breasts (about 1.5 lbs total), sliced horizontally into thin cutlets
- ½ cup all-purpose flour
- 1 teaspoon kosher salt
- ½ teaspoon black pepper
- ½ teaspoon garlic powder
- ¼ teaspoon paprika
- 3 tablespoons olive oil, divided
- 2 tablespoons unsalted butter, divided
Sauce
- 3 cloves garlic, minced
- ½ cup dry white wine (such as Sauvignon Blanc or Pinot Grigio)
- ¾ cup low-sodium chicken broth
- 3 tablespoons fresh lemon juice (about 1 large lemon)
- 2 tablespoons capers, drained
- 3 tablespoons cold unsalted butter, cut into small cubes
Garnish
- 2 tablespoons fresh parsley, chopped
- Lemon slices, for serving
Ingredient Notes
Chicken breasts — Slicing them yourself horizontally into thin cutlets saves money compared to buying pre-cut scallopini or thin-sliced breasts, and lets you control the thickness. If you’d rather skip this step, ask your butcher to do it for you.
Dry white wine — This adds acidity and depth to the sauce. If you prefer to cook without alcohol, substitute an equal amount of additional chicken broth mixed with a small squeeze of extra lemon juice.
Capers — These briny little bursts of flavor are classic in scallopini and piccata-style sauces. If you’re not a fan, they can be left out entirely without hurting the sauce.
Cold butter — Adding the butter cold and whisking it in off the heat is what gives the sauce its silky, slightly thickened texture. Room-temperature or melted butter won’t create the same effect.
Flour — Standard all-purpose flour works well for dredging. For a gluten-free version, swap in a 1:1 gluten-free flour blend or cornstarch.
Kitchen Equipment
- Sharp chef’s knife
- Cutting board
- Meat mallet or rolling pin (for pounding cutlets to an even thickness)
- Large shallow dish or pie plate (for dredging)
- Large heavy-bottomed skillet, preferably stainless steel or cast iron
- Tongs
- Whisk
- Instant-read meat thermometer
Instructions
- Prepare the cutlets. Place each chicken breast between two sheets of plastic wrap and gently pound with a meat mallet until it reaches an even thickness of about ¼ inch. This ensures the cutlets cook quickly and evenly, without any thick spots staying raw in the center.
- Season the flour. In a shallow dish, whisk together the flour, salt, pepper, garlic powder, and paprika. This seasoned flour will coat the chicken and help build flavor right from the first bite, so don’t skip seasoning it directly rather than the chicken alone.
- Dredge the chicken. Working one piece at a time, press each cutlet into the flour mixture, turning to coat both sides evenly. Shake off any excess flour — a thin, even coating is what you’re after, not a thick crust.
- Heat the pan. Set a large skillet over medium-high heat and add 2 tablespoons of olive oil along with 1 tablespoon of butter. Let the butter melt and the mixture shimmer, about 1 to 2 minutes, before adding any chicken.
- Sear the first batch. Add half of the chicken cutlets to the pan in a single layer, being careful not to crowd them. Cook for 2 to 3 minutes per side, until golden brown and the internal temperature reaches 165°F (74°C). Transfer to a plate and tent loosely with foil.
- Cook the second batch. Add the remaining 1 tablespoon of olive oil and 1 tablespoon of butter to the pan, then repeat the searing process with the remaining cutlets. Once cooked through, transfer them to the same plate with the first batch.
- Sauté the garlic. Lower the heat to medium and add the minced garlic to the same skillet, scraping up any golden browned bits from the bottom of the pan. Cook for about 30 seconds, just until fragrant, stirring constantly so it doesn’t burn.
- Deglaze with wine. Pour in the white wine and let it simmer for 2 to 3 minutes, allowing it to reduce by about half. This step cooks off the sharp alcohol taste while concentrating the wine’s flavor into the base of the sauce.
- Build the sauce. Stir in the chicken broth, lemon juice, and capers. Bring the mixture to a gentle simmer and let it cook for 3 to 4 minutes, until it has reduced slightly and the flavors have melded together.
- Finish with butter. Remove the skillet from the heat and whisk in the cold butter cubes a few pieces at a time, waiting until each addition is mostly melted before adding more. This technique, called mounting the sauce, gives it a glossy, velvety texture.
- Return the chicken and serve. Nestle the cooked cutlets back into the sauce, spooning it over the top to warm everything through for about a minute. Garnish with chopped parsley and lemon slices, then serve immediately while the sauce is still silky.
Chef Tips
- Pound the chicken to an even thickness so every piece cooks at the same rate.
- Don’t skip patting the chicken dry before dredging — excess moisture prevents a good crust from forming.
- Work in batches rather than crowding the pan, which causes the chicken to steam instead of sear.
- Use a splatter guard if you have one, since the initial sear can be a bit spattery.
- Keep the seared chicken warm under loosely tented foil so it doesn’t dry out while you finish the sauce.
- Taste the sauce before adding the chicken back in and adjust the lemon or salt as needed.
- Add the cold butter off direct heat to avoid the sauce breaking or turning oily.
- Use a stainless steel or cast iron skillet rather than nonstick, since the browned bits left behind add flavor to the sauce.
- If your sauce reduces too much, loosen it with an extra splash of chicken broth.
- Serve immediately for the best texture, as the sauce is at its silkiest right after it’s made.
Variations
- Spicy Scallopini — Add a pinch of red pepper flakes to the sauce while it simmers for a gentle kick.
- Mushroom Scallopini — Sauté sliced mushrooms in the pan after removing the chicken, before adding the garlic, for an earthy twist.
- Air Fryer Version — Cook the dredged cutlets in a 400°F (200°C) air fryer for 8 to 10 minutes, flipping halfway, then make the sauce separately in a skillet.
- Oven Baked Version — Sear the cutlets briefly on the stovetop, then finish them in a 375°F (190°C) oven for 8 to 10 minutes while you prepare the sauce.
- Creamy Scallopini — Stir in ¼ cup of heavy cream along with the butter for a richer, more decadent sauce.
- Low Carb Version — Swap the flour dredge for almond flour or a light dusting of parmesan cheese.
- Dairy Free Version — Use a plant-based butter substitute and skip the cream variation.
- Gluten Free Version — Use a 1:1 gluten-free flour blend in place of all-purpose flour for the dredge.
What to Serve With It
- Buttered pasta — A simple tangle of noodles is perfect for soaking up the extra sauce.
- Garlic mashed potatoes — Creamy potatoes make a comforting base for the tangy sauce.
- Roasted asparagus — Adds a fresh, slightly crisp contrast to the tender chicken.
- Steamed green beans — A light, simple side that lets the chicken take center stage.
- Crusty bread — Essential for mopping up every last bit of the lemon-butter sauce.
- Simple arugula salad — The peppery greens balance the richness of the dish.
- Rice pilaf — A mild, fluffy side that absorbs the sauce nicely.
- Sautéed spinach — Quick to prepare and adds a pop of color to the plate.
- Roasted cherry tomatoes — Their sweetness pairs beautifully with the bright lemon notes.
- Parmesan risotto — For a more indulgent, restaurant-style dinner at home.
Storage
Refrigerator
Let the chicken and sauce cool to room temperature, then transfer to an airtight container. Store in the refrigerator for up to 3 days.
Freezer
Place cooled chicken and sauce in a freezer-safe container, leaving a little room for expansion. Freeze for up to 2 months, though the sauce’s texture is best enjoyed fresh rather than after freezing.
Reheating
Gently reheat in a skillet over low heat, adding a splash of chicken broth if the sauce has thickened too much. Avoid microwaving on high, as it can cause the chicken to turn rubbery and the sauce to separate.
Common Mistakes to Avoid
- Skipping the step of pounding the chicken evenly, which leads to uneven cooking.
- Overcrowding the pan, which prevents the cutlets from developing a golden crust.
- Using a nonstick pan, which doesn’t leave behind the flavorful browned bits needed for the sauce.
- Adding the butter while the pan is still very hot, which can cause the sauce to break.
- Over-dredging the chicken with too much flour, resulting in a gummy coating.
- Not tasting the sauce before serving to adjust seasoning or acidity.
- Letting the wine boil too vigorously, which can make the sauce taste harsh.
- Overcooking the chicken, since thin cutlets need only a few minutes per side.
- Skipping the resting step for the seared chicken, which can cause it to dry out.
- Using bottled lemon juice instead of fresh, which changes the brightness of the sauce.
Frequently Asked Questions
Can I use chicken thighs instead of chicken breasts? Yes, boneless skinless thighs can work, though they’ll have a slightly different texture and richer flavor. Pound them to an even thickness just as you would with breasts.
What can I use instead of white wine? Substitute an equal amount of chicken broth with an extra small squeeze of lemon juice to mimic the acidity the wine provides.
Why did my sauce turn out greasy instead of silky? This usually happens when the butter is added over high heat or all at once. Remove the pan from heat and whisk in the cold butter gradually for the best texture.
Can I make this dish ahead of time? The chicken can be pounded and dredged a few hours ahead and refrigerated, but the dish is best cooked and served fresh since the sauce loses some of its silky texture over time.
Is chicken scallopini the same as chicken piccata? They’re very similar, with piccata typically emphasizing capers and lemon a bit more heavily, while scallopini refers more broadly to the technique of thin, quickly seared cutlets.
Can I use pre-sliced thin chicken cutlets? Absolutely — using store-bought thin-sliced cutlets saves you the step of pounding the chicken yourself, though you may still want to check for even thickness.
How do I know when the chicken is fully cooked? Use an instant-read thermometer and look for an internal temperature of 165°F (74°C) at the thickest part of the cutlet.
Can I make this recipe dairy free? Yes, simply swap the butter for a plant-based butter alternative in both the searing and sauce-finishing steps.
What’s the best pan to use for this recipe? A stainless steel or cast iron skillet works best, since the browned bits left behind after searing add depth to the sauce.
Can I double this recipe for a larger group? Yes, this recipe doubles well. Just be sure to cook the chicken in batches so the pan isn’t overcrowded, and use a larger skillet for the sauce if needed.
Nutrition Information
| Nutrient | Per Serving |
|---|---|
| Calories | 385 kcal |
| Protein | 36 g |
| Carbohydrates | 9 g |
| Fat | 22 g |
| Saturated Fat | 9 g |
| Cholesterol | 125 mg |
| Sodium | 520 mg |
| Potassium | 610 mg |
| Fiber | 1 g |
| Sugar | 1 g |
| Vitamin A | 8% DV |
| Vitamin C | 15% DV |
| Calcium | 3% DV |
| Iron | 10% DV |
Nutrition values are approximate and may vary depending on the ingredients used.
Recipe Tips for Success
- Always pound the chicken to an even thickness before cooking for consistent results.
- Pat the cutlets dry before dredging so the flour adheres properly.
- Keep the heat at medium-high for searing, but lower it before adding garlic to prevent burning.
- Use fresh lemon juice rather than bottled for the brightest flavor.
- Add the butter off the heat, a little at a time, for a silky finished sauce.
- Don’t skip resting the seared chicken under foil while you build the sauce.
- Taste and adjust the sauce’s seasoning right before serving.
- Serve the dish immediately for the best texture and presentation.
Final Thoughts
Chicken scallopini is one of those recipes that proves a truly memorable meal doesn’t need a long ingredient list or hours in the kitchen. With a quick sear and a bright, buttery pan sauce, you get all the elegance of a special dinner with the ease of a weeknight staple. It’s a dish that welcomes experimentation too, so don’t be afraid to swap in your favorite variation or pair it with whatever side dishes you have on hand.
I hope this recipe finds its way into your regular rotation the same way it has mine. Whether you’re cooking for your family on a Tuesday night or plating it up for guests on the weekend, it’s guaranteed to impress without any added stress. Give it a try, make it your own, and don’t forget to pass it along to anyone who loves a good, comforting chicken dinner.
Leave a Reply